There’s more to a push-up than meets the eye. Stephanie Glickman coaches us through the perfect, Pilates-style push-up.
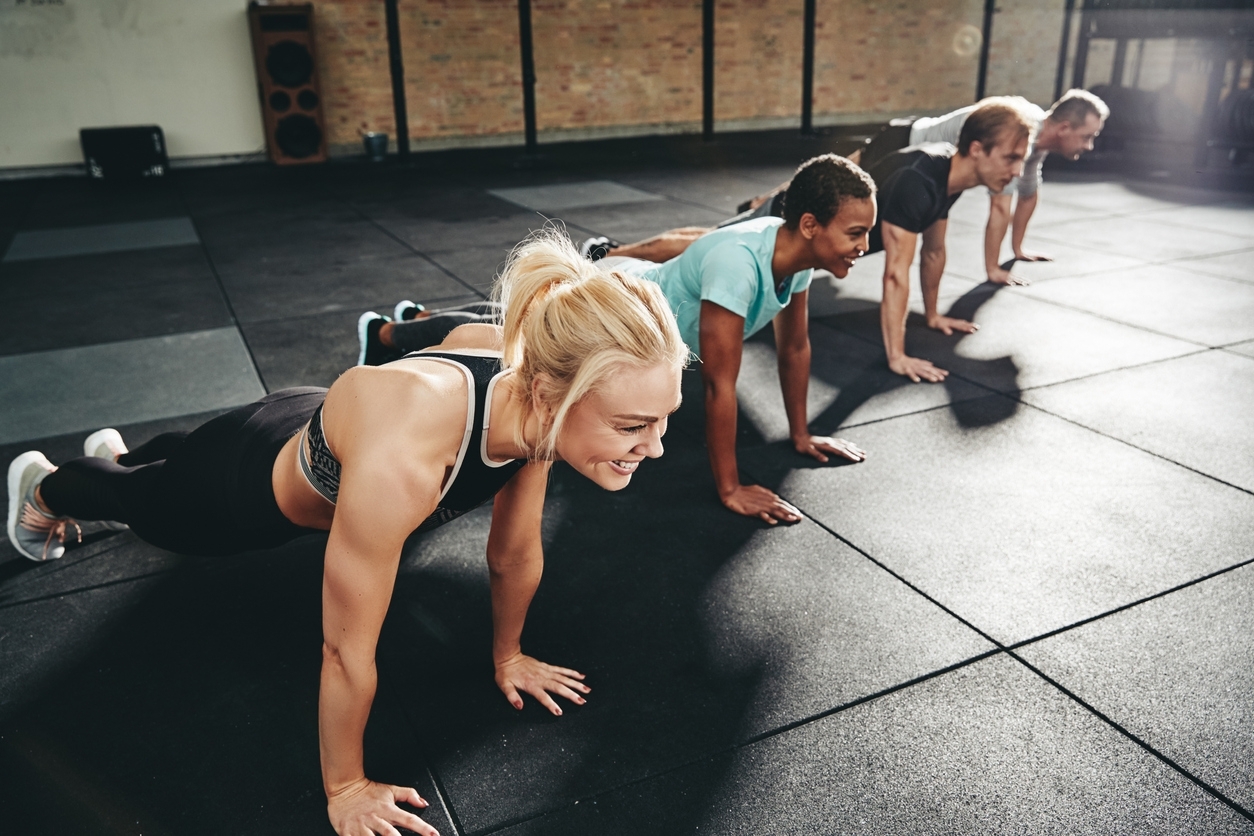
In both life and strength training, the ‘push’ is a fundamental movement, with the push-up being one of the best pushing exercises ever! No equipment required, push-ups are easily scalable and have infinite options to spice them up.
The push-up uses multiple joints, including wrist, elbow, scapulae and shoulder, as well as requiring active tension throughout the whole body. So, they are extremely functional to boot!
Push-up, Pilates style
Even Joseph Pilates included the push-up as the final exercise of his matwork series.
Beginning in a standing position, the head and spine roll down until the hands reach the floor. The hands then walk out to a plank position, ready to do a prescribed number of push-ups. The entire exercise then reverses back through to standing.
In Pilates’ version, the push-up is just one component of a choreographic series that starts and finishes in standing. Being the conclusion of the series, it brings the focus up off the mat, onto the feet and into upright posture. It challenges co-ordination, endurance and the ability to weight bear and locomote through the wrists, fingers and hands. It’s multiple components also have an element of ‘flowing’ movement, a quality associated with Pilates exercises.
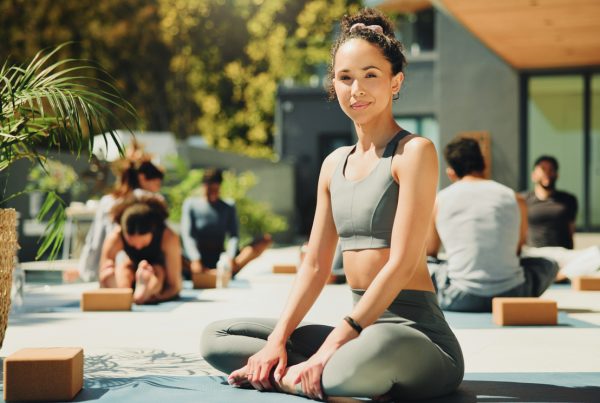
Any variation of the Pilates push-up can be a great addition to a multi-level class. As long as someone can roll down and get into quadruped position, they can do the Pilates push-up.
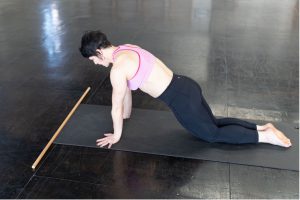
Let’s zone in on the push-up itself and what’s involved. In any version of a push-up, the bodyline, wrists, hands and scapulae (among other things) are crucial to condition and consider.
Isometric body line – active tension
Strength movements of all kinds require an active tension in the bodyline. Sometimes called core stability, core strength or centring – whatever its name, it’s a position of muscular tension around the whole torso. It involves intrinsic and global muscles of the anterior, posterior and lateral trunk. Active tension retains a tight relationship between the ribcage (thoracic) and the hips/pelvis, without a breaking of the spine line.
In Pilates it is often a ‘neutral spine’ position, one that maintains the lumbar in a gentle lordosis, but in bodyweight, gymnastics-based strength training, the active tension position can have a lengthened, slightly flexed lumbar spine. The slightly flexed spine increases the abdominal contraction and emphasises a protraction of the scapulae.
 In a back body line, or body hollow, the lower ribs maintain a connection to the front of the pelvis, and the lumbar spine is lengthened into the mat and slightly flexed.
Holding an isometric body line is a strength challenge. The straighter and lower the legs, the stronger it is. The further back the arms, the stronger it is. This is a foundation of a pushing movement, even though there is no load into pushing.
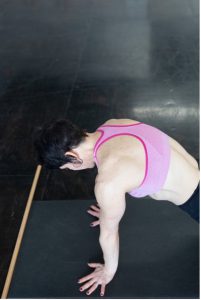
Flip this isometric body line over to prone on the hands and it looks like a plank position. Now the hands are fixed, elbows are straight and it is possible to push away from the floor, creating a loaded tension on the scapulae protractors. The lower rib/pelvis connection remains intact.
 A plank is an active tension position. Push away from the floor, protract scapulae, lengthen the lumbar spine, contract glutes and abdominals. Thoracic spine may appear flexed.
It is from this active tension/plank position that a full push-up starts. Of course, it can be modified to the knees or to a quadruped position, but the concept of the isometric body line hold remains regardless. This active tension and sustained scapulae pushing/protraction are crucial components of the push-up. Being able to hold this position also relies on placement and endurance of the wrists, hands and elbows.
Wrists and hands
Wrists and hands are the end of the chain, so to speak, but they connect through fascia all the way up into the upper back and trunk. They are often a weak link for a push-up and many clients complain about painful wrists whenever they weight bear onto them.
Mobilising the finger tendons (which attach through to the wrist/forearm muscles) and slowly acclimatising the hands to be able to tolerate load is a crucial and often under-practised activity.
Let’s face it – wrist and finger exercises are not generally considered fun or sexy, but ask any hand balancer, acrobat or even weightlifter how much wrist conditioning they do and the answer will be “a lot”.
Wrist and finger exercises need to be introduced gradually. Consider doing three to five minutes of different variations every time you work, pushing or pulling. Build up endurance over time.
Make sure to load all fingers and parts of the palm equally. It’s easy to bias weight onto one side of the hand or a few fingers only.
Wrist flexion raises
These are a nice place to start. Begin in quadruped and try to keep the shoulders over the wrist. But, if this isn’t possible, then start sitting back on your heels.
The more weight you put over your hands (i.e., the further forward your shoulders are over the hands), the heavier this exercise becomes.
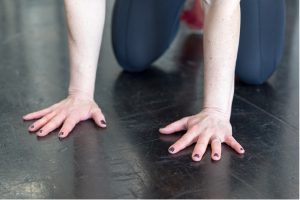
The starting position of wrist flexion raises is palms flat on floor, fingers spread and weighted as evenly as possible.
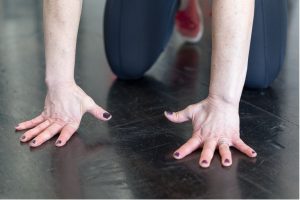
Lift the palm and thumb up slowly, while the other four fingers remain fully on the floor. Lower the palms back down slowly.

Wrist flexion raises can be down with fingers facing in all directions – front, back or side. Different angles target different ranges of movement and tendons.
Whatever the finger position, remember to only raise the palm and thumb and check that the four fingers remain pressed into the floor. Then slowly lower the palms back down. Continue to raise the palm and thumb smoothly up and down. Try to do both sides at the same time, with no staggers or jerky movements. Aim for 10-15 repetitions.
There may not be much range of movement, depending on the individual. And full disclosure – this can be uncomfortable! But start small and do it frequently, and it gets easier.
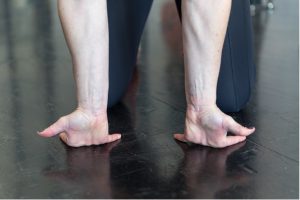
Wide arm, internally rotated push-up
Another thing to try is a wide arm, internally rotated push-up for a mobility variation targeting the lateral wrist tendons and anterior shoulder and chest. The shoulder joint will be in internal rotation and the scapulae will be protracted.

Begin with hands wider than shoulders and fingers pointing as much as possible towards the body. Keep elbows as straight as possible.
Lower the body downwards, aiming the chest and collarbone to the floor. To increase the anterior shoulder opening, aim the head down towards the knees.
Done in quadruped with knees under hips, this is not a heavy push-up, but it is very strong on the forearm tendons. Begin with just a small range of movement and slowly build that over time. Aim for 10-15 reps.
And full disclosure again – this can also be uncomfortable but, with practise, it eases off.
Scapulae
Oh, the wonderful scapulae. Good scapulae movement and control is a prerequisite for spine and shoulder joint function. They are part of a team! And they are especially important in a push-up.
A push-up is a PUSH. Pushes involve protraction of the scapulae. In protraction, the scapulae wrap around the sides of the ribs and spread apart from each other. In a protracted position, the scapulae look flat and flush to the ribcage.
When the scapulae protract, the thoracic spine may also flex a little bit or appear flexed.
To improve pushing movements in general, and the push-up in particular, scapulae protraction needs to be loaded (i.e., have some resistance into the protracted movement.) This can be done in quadruped on the hands, as in a plank position. Or, for a lighter option, facing a wall with palms flat on the wall. These are closed chain options, as the hands are fixed on either the floor or the wall.
For a more open chain option, a prop like a power band also works well.
In all these variations, the arms and elbows should be as straight as possible and the ribcage and pelvis still.
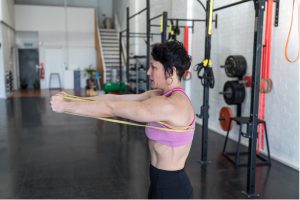
A power band wrapped around the base of the scapulae and held in front of the body in a fist with straight elbows creates protraction of the scapulae. Think of reaching the fists further towards the wall in front of you. This is a version of loaded scapulae protraction.
Practise scapulae protraction into the largest range possible. Practise holding the resisted protraction for a few seconds. Then counter with scapulae retraction.
Essentially, move between loaded protraction and retraction of the scapulae through as much range as possible. This is an isolation movement of the scapulae. Done loaded and with straight elbows, this is called a scapula push-up.
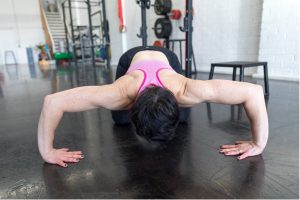
Scapula push-up
In a scapula push-up, the elbows are straight, the hands and fingers spread and firmly in contact with the floor, and the body line is tight.
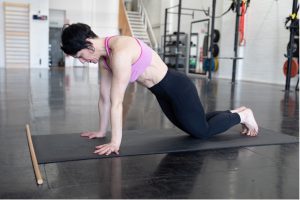
Start in protraction of the scapulae. Focus on pushing up away from the floor.
In scapulae retraction, the scapulae will move towards each other.Move between protraction and retraction of the scapulae to create the scapula push-up. Aim for 10-15 repetitions. To make the scapula push-up easier, work with knees directly under hips. To make it more difficult, work on the toes.
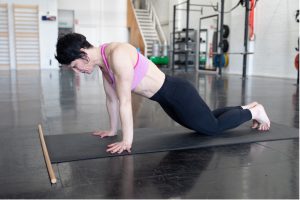
Putting it together – the full push-up
In a push-up, the scapula protraction is easy to feel on the concentric phase (pushing up away from the floor), as there is tension through the closed chain of the hands, wrists, arms, shoulders and scapulae pushing AWAY from the floor in order to bring the bodyweight up through space.
At the top of the concentric phase, there is good feedback for scapulae protraction.
However, in the push-up’s eccentric phase (lowering the bodyweight down to the floor), as the elbow bends and the feeling of push weakens, it is much harder to maintain scapulae protraction. Intuition suggests that the scapulae should retract (come towards each other) as the body lowers.
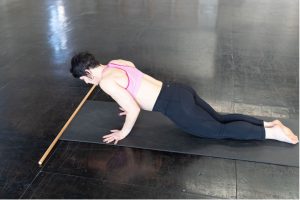
As the body lowers and the elbows bend, it becomes harder to maintain the feeling of scapulae protraction.
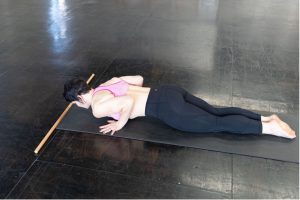
The bottom of the push-up, at full elbow flexion, is the hardest point of the movement to generate scapulae protraction.
Herein lies the true pushing strength challenge of the push-up: to maintain the sensation of pushing the body away from the floor even in the eccentric phase down.
Achieving this requires building strength in loaded scapulae protraction, wrists and hands, and maintaining the core (active tension) line of the body.
Even to the most seasoned athlete, the push-up is never easy. With its limitless ways to perfect and progress, it is a fundamental pattern that deserves pride of place in all of our strength training programmes.
For more ideas on progressing and regressing the push-up, check out the video below.
Want to learn more with Stephanie? You can choose from these online educations:
- Pilates for Strength Training
- Pilates for Pregnancy
- Fundamental Matwork Pilates
- Intermediate Matwork Pilates
- Pilates for Hips and Shoulders
- Pilates with Props
Which one will you choose?
Are you a Pilates instructor looking for cover?
View our Pilates instructor insurance here.