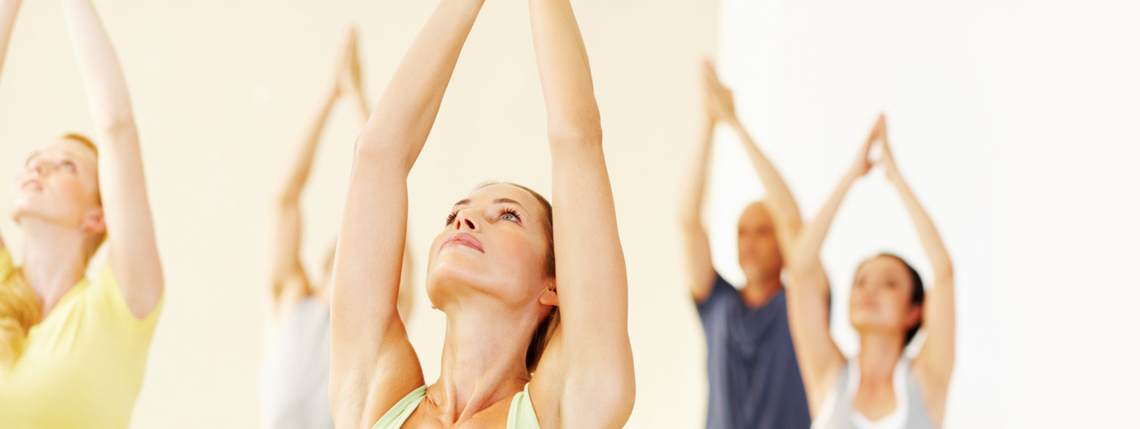
Teaching yoga to athletes is a great responsibility as the needs of an athlete differ from those of a yogi. Gwen Lawrence tells us more.
Typically, athletes do not have the flexibility that a typical yoga practitioner has; their sport sets them up for work on the field of play, which sets them up for imbalances that can lead to injury. A typical yogi has unlimited time to devote to the practice of yoga, and the goals of a typical yoga class are inner peace, increased sensitivity to stress, and improved flexibility through discipline. While these are all important to athletes, you must be sensitive to the specific training demands of competitive sports. Athletes must invest time in activities that will produce peak performance, and their goals may also include longevity in their sport and injury prevention.
When developing classes geared towards athletes’ goals, teachers of Power Yoga for Sports (PYFS) must address an athlete’s training demands, the most probable potential injuries, tasks on the field of play, body type, and common movements. Teachers must develop routines on the fly that align with daily injury assessments and complaints. Typical yoga teachers teach classes in line with what they are feeling, but those who teach PYFS have to feel the needs of others. Therefore, as you teach PYFS, you need to stay up to date on all of your athletes’ injuries and with the latest research on sport sciences.
Here, we focus on balance within the athlete’s body and its importance in injury prevention. You will learn functional strength moves that will humble the most muscular athletes, and moves that will help them to improve their flexibility and range of motion. You will also learn to cultivate mental toughness, which involves training the athlete to stay in difficult poses using mindfulness and breathing techniques to go the distance. And, finally, you will learn to teach athletes to focus so that, instead of just robotically performing yoga moves, they focus their minds and detach from distractions both on and off the field. Power Yoga for Sports can take athletes to the next level.
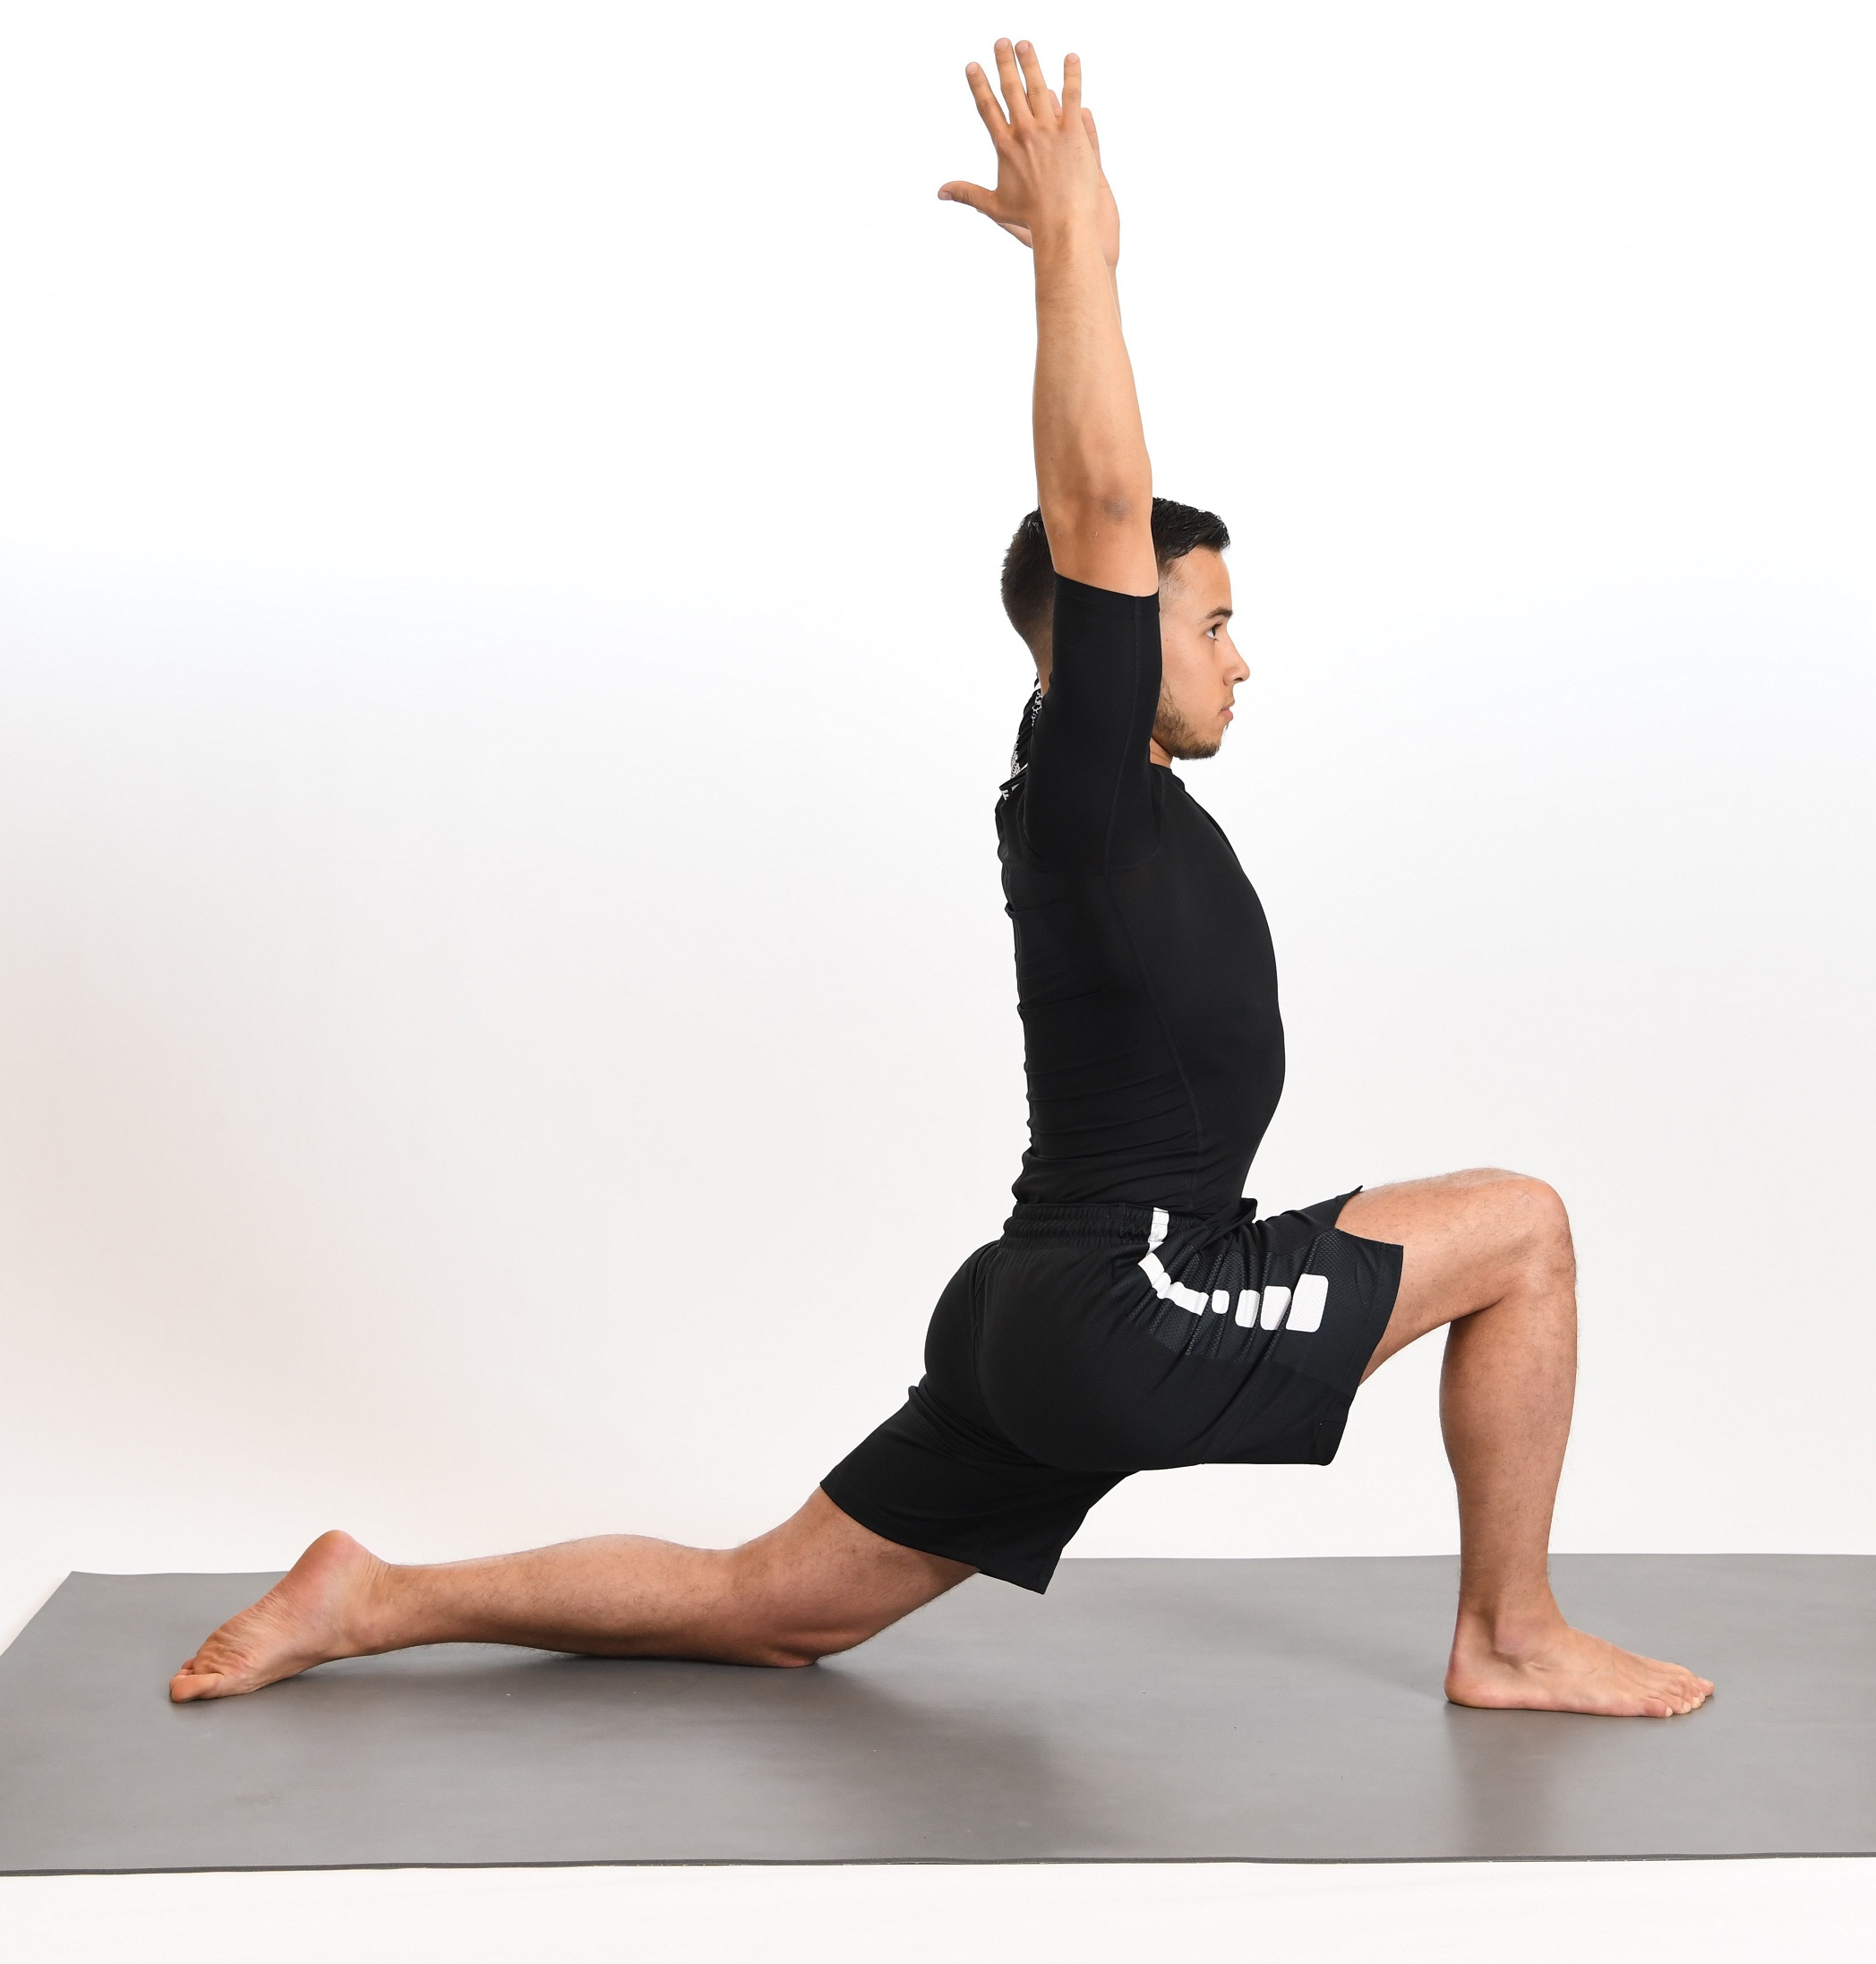
Crescent lunge
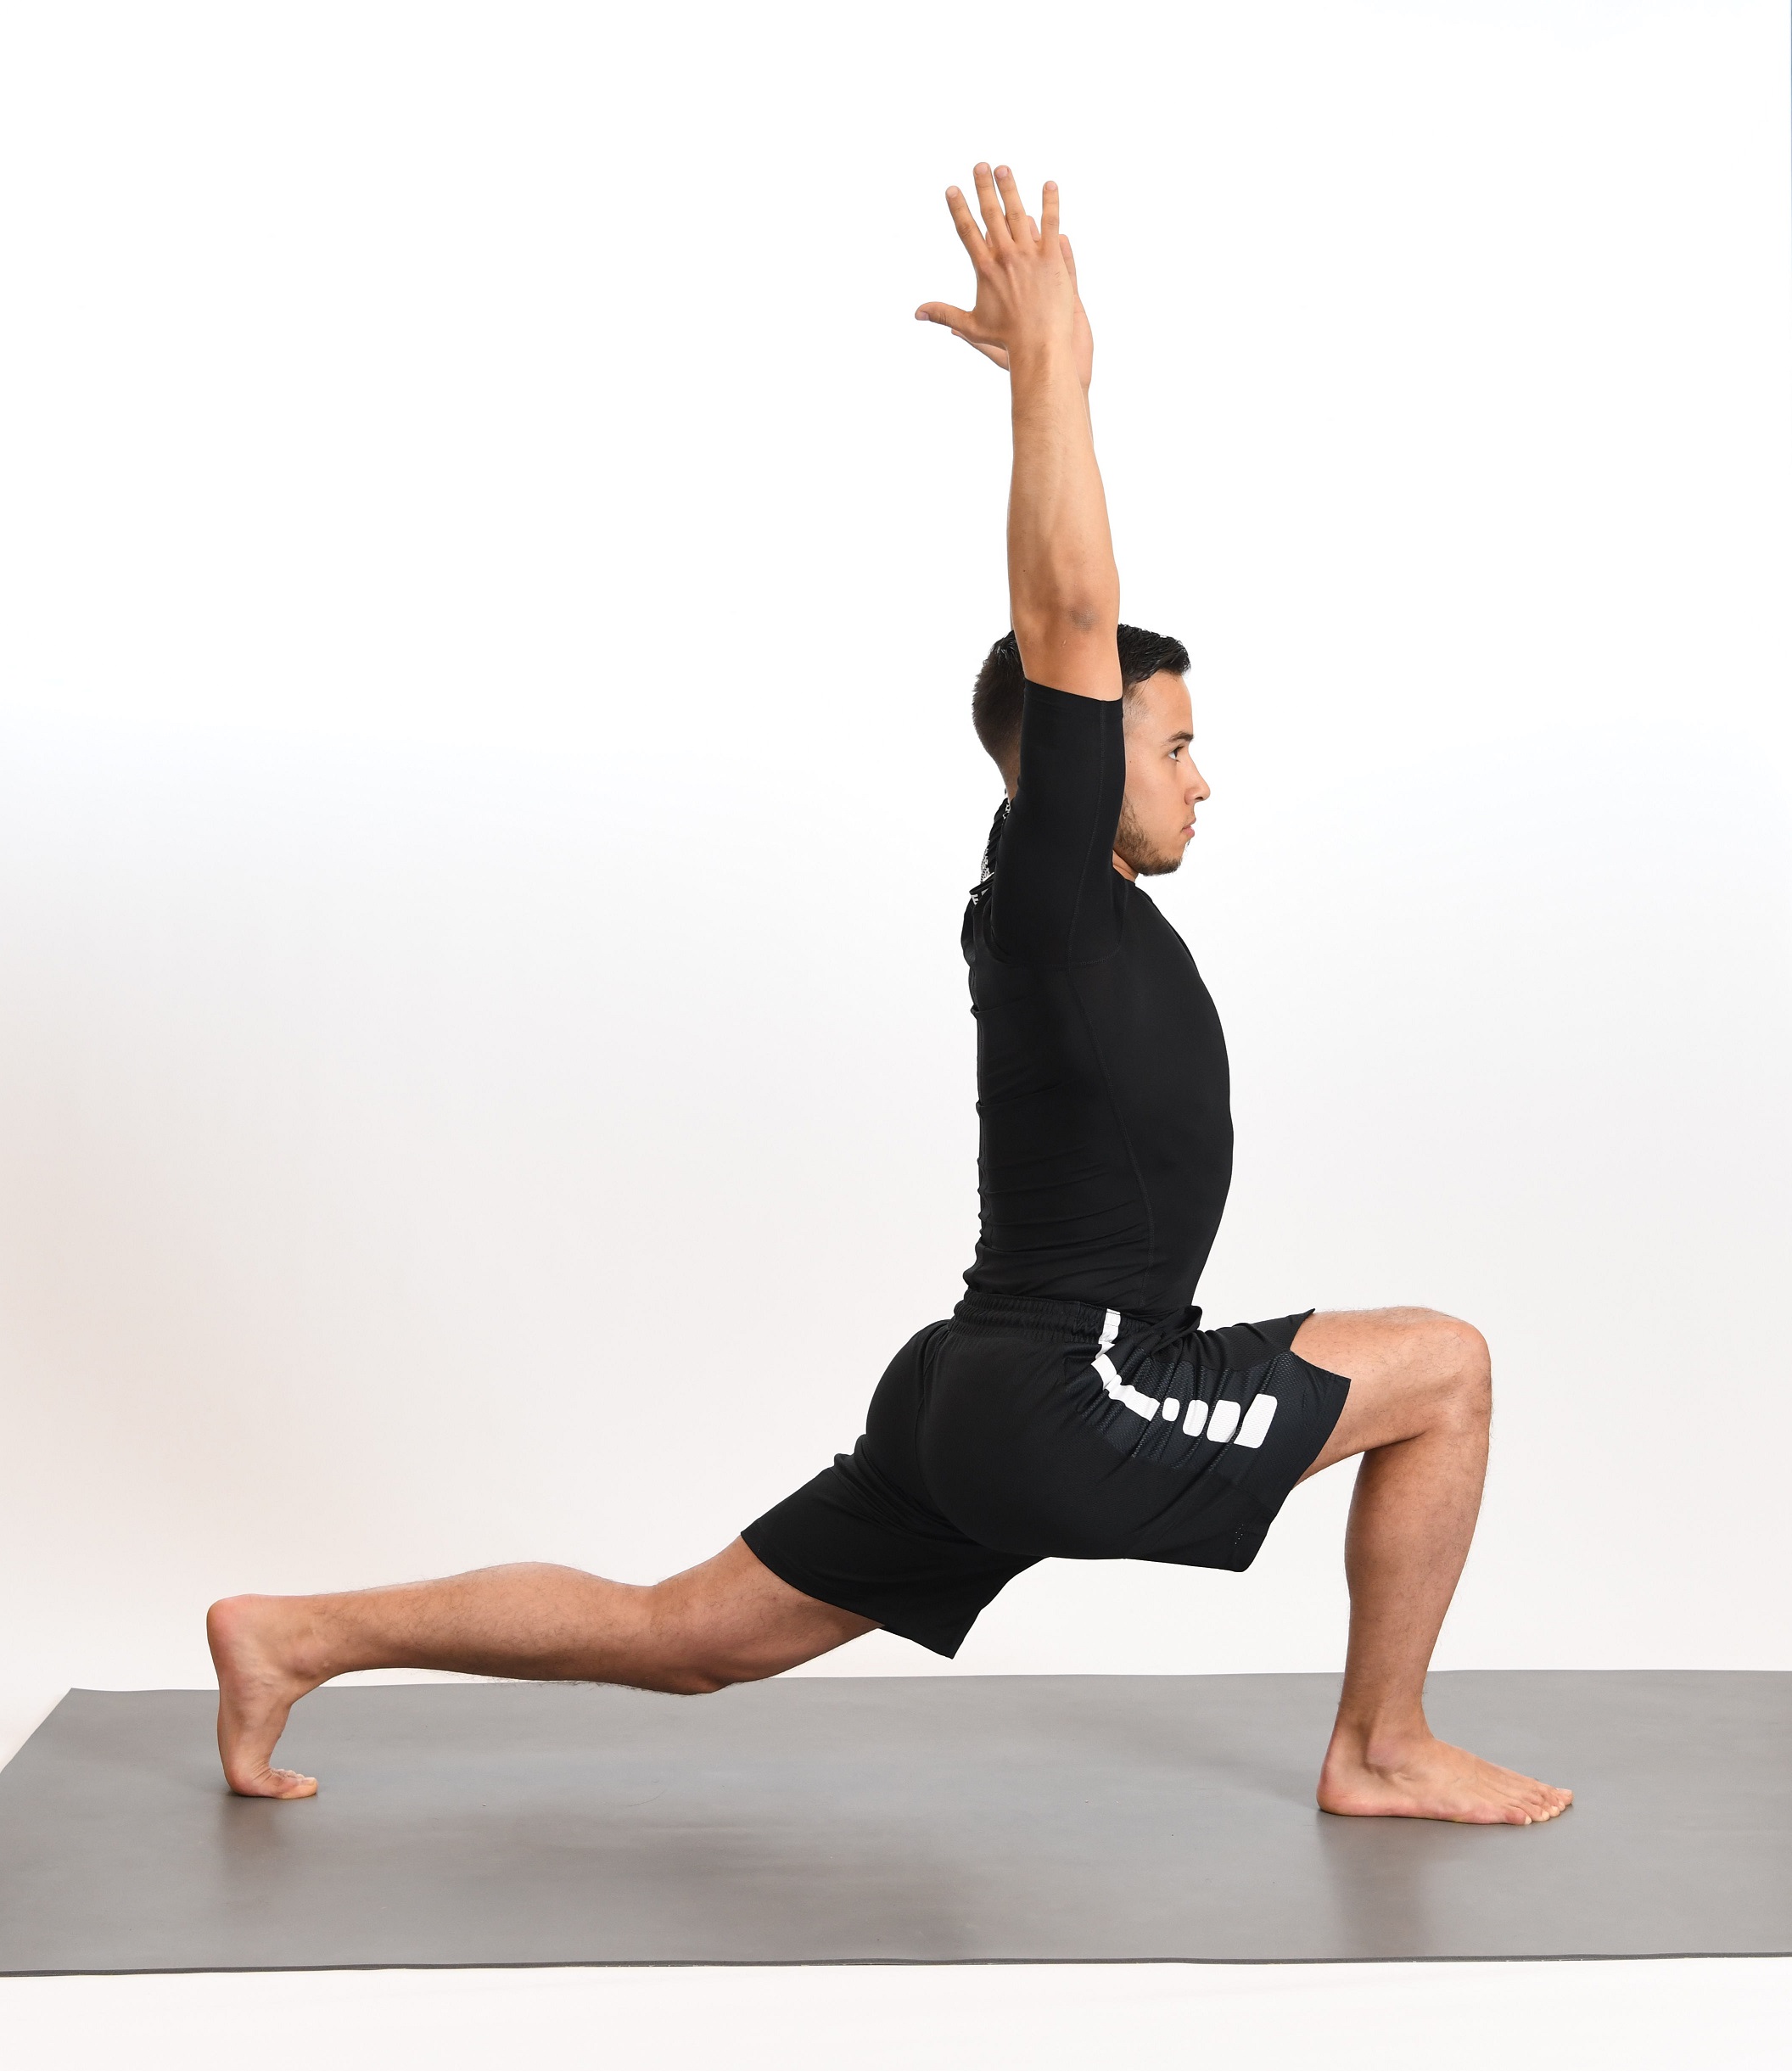
This is a very familiar pose. Most of you have done it without even knowing its roots are in yoga. It is many stretches in one, which makes it a great stretch for athletes to incorporate into their routines. Be sure to familiarise yourself with the particulars of a runner’s stretch so you can maintain perfect alignment. This pose is a great choice for helping improve balance. Any time you are working with balance in a pose, you are using the abdominal muscles. It is very subtle but effective. When you achieve balance, you are in a more focused state, clearing your mind and deepening your breath.
For the athlete, the lunge is a perfect choice to open the hip flexors and the front of the thigh. We focus a lot on the tightness of the hamstrings; the truth is, you need to address the complementary muscles just as much to increase flexibility. When an athlete opens both the hamstrings and the hip flexors, it becomes easier to run, jump and recover. You lower the risk of injury by being more symmetrical, so there is less stress in one direction. You also reduce the pressure on the knee by opening and releasing the hip joint more deeply.
Benefits
- Strengthens the support muscles of the knee
- Strengthens and aligns the legs and hips
- Opens the hip joint in extension and flexion
- Helpful for sciatic problems
- Strengthens the abs
- Opens the quadriceps and hip flexors
- Stretches the calves
- Opens the bottom of the foot and toes to reduce symptoms of plantar fasciitis
- Helps athletes increase speed
Contraindications
This pose is contraindicated for those who have had recent knee or neck surgery and for those with acute foot pain. Those who have hip or low-back issues should use modifications, such as putting the knee to the floor and holding it for a shorter amount of time.
Method
- Begin on your hands and knees in table top pose
- Bring the right foot forward between the hands so the right knee is directly over the right ankle or heel and forms a 90-degree angle; this creates a strong base with the least amount of strain and effort
- Tuck the left toes under and straighten the left leg
- Peek down and make sure your left heel is straight up to the sky and you are on all five left-foot toes; this guarantees the safety of the knee
- Lift up onto the fingertips and start to extend the spine and elongate the neck – you can place blocks under the fingers if you need more room
- Square the hips and shoulders to the front of the room, and make certain that your knee always tracks directly over your foot to secure the safety of the right knee
- Tuck the tailbone under to increase the stretch to the left hip flexor, press all the way back through the left heel, and feel the energy all the way through the top of your head
- Stay here for several breaths, or climb your hands onto your right thigh and hold (another option is to bring your arms up to the sky, palms facing each other with length in your side, and hold) – whatever variation you choose, think as much about length in your spine as you do about the depth of flexion in your right knee
Variations
Variation 1
Try knee-down crescent lunge as a variation by lowering the back knee to the floor if you are not strong enough to straighten the back leg or if you are having low-back issues (see variation 1); this variation enhances the stretch in the straight leg’s hip flexor
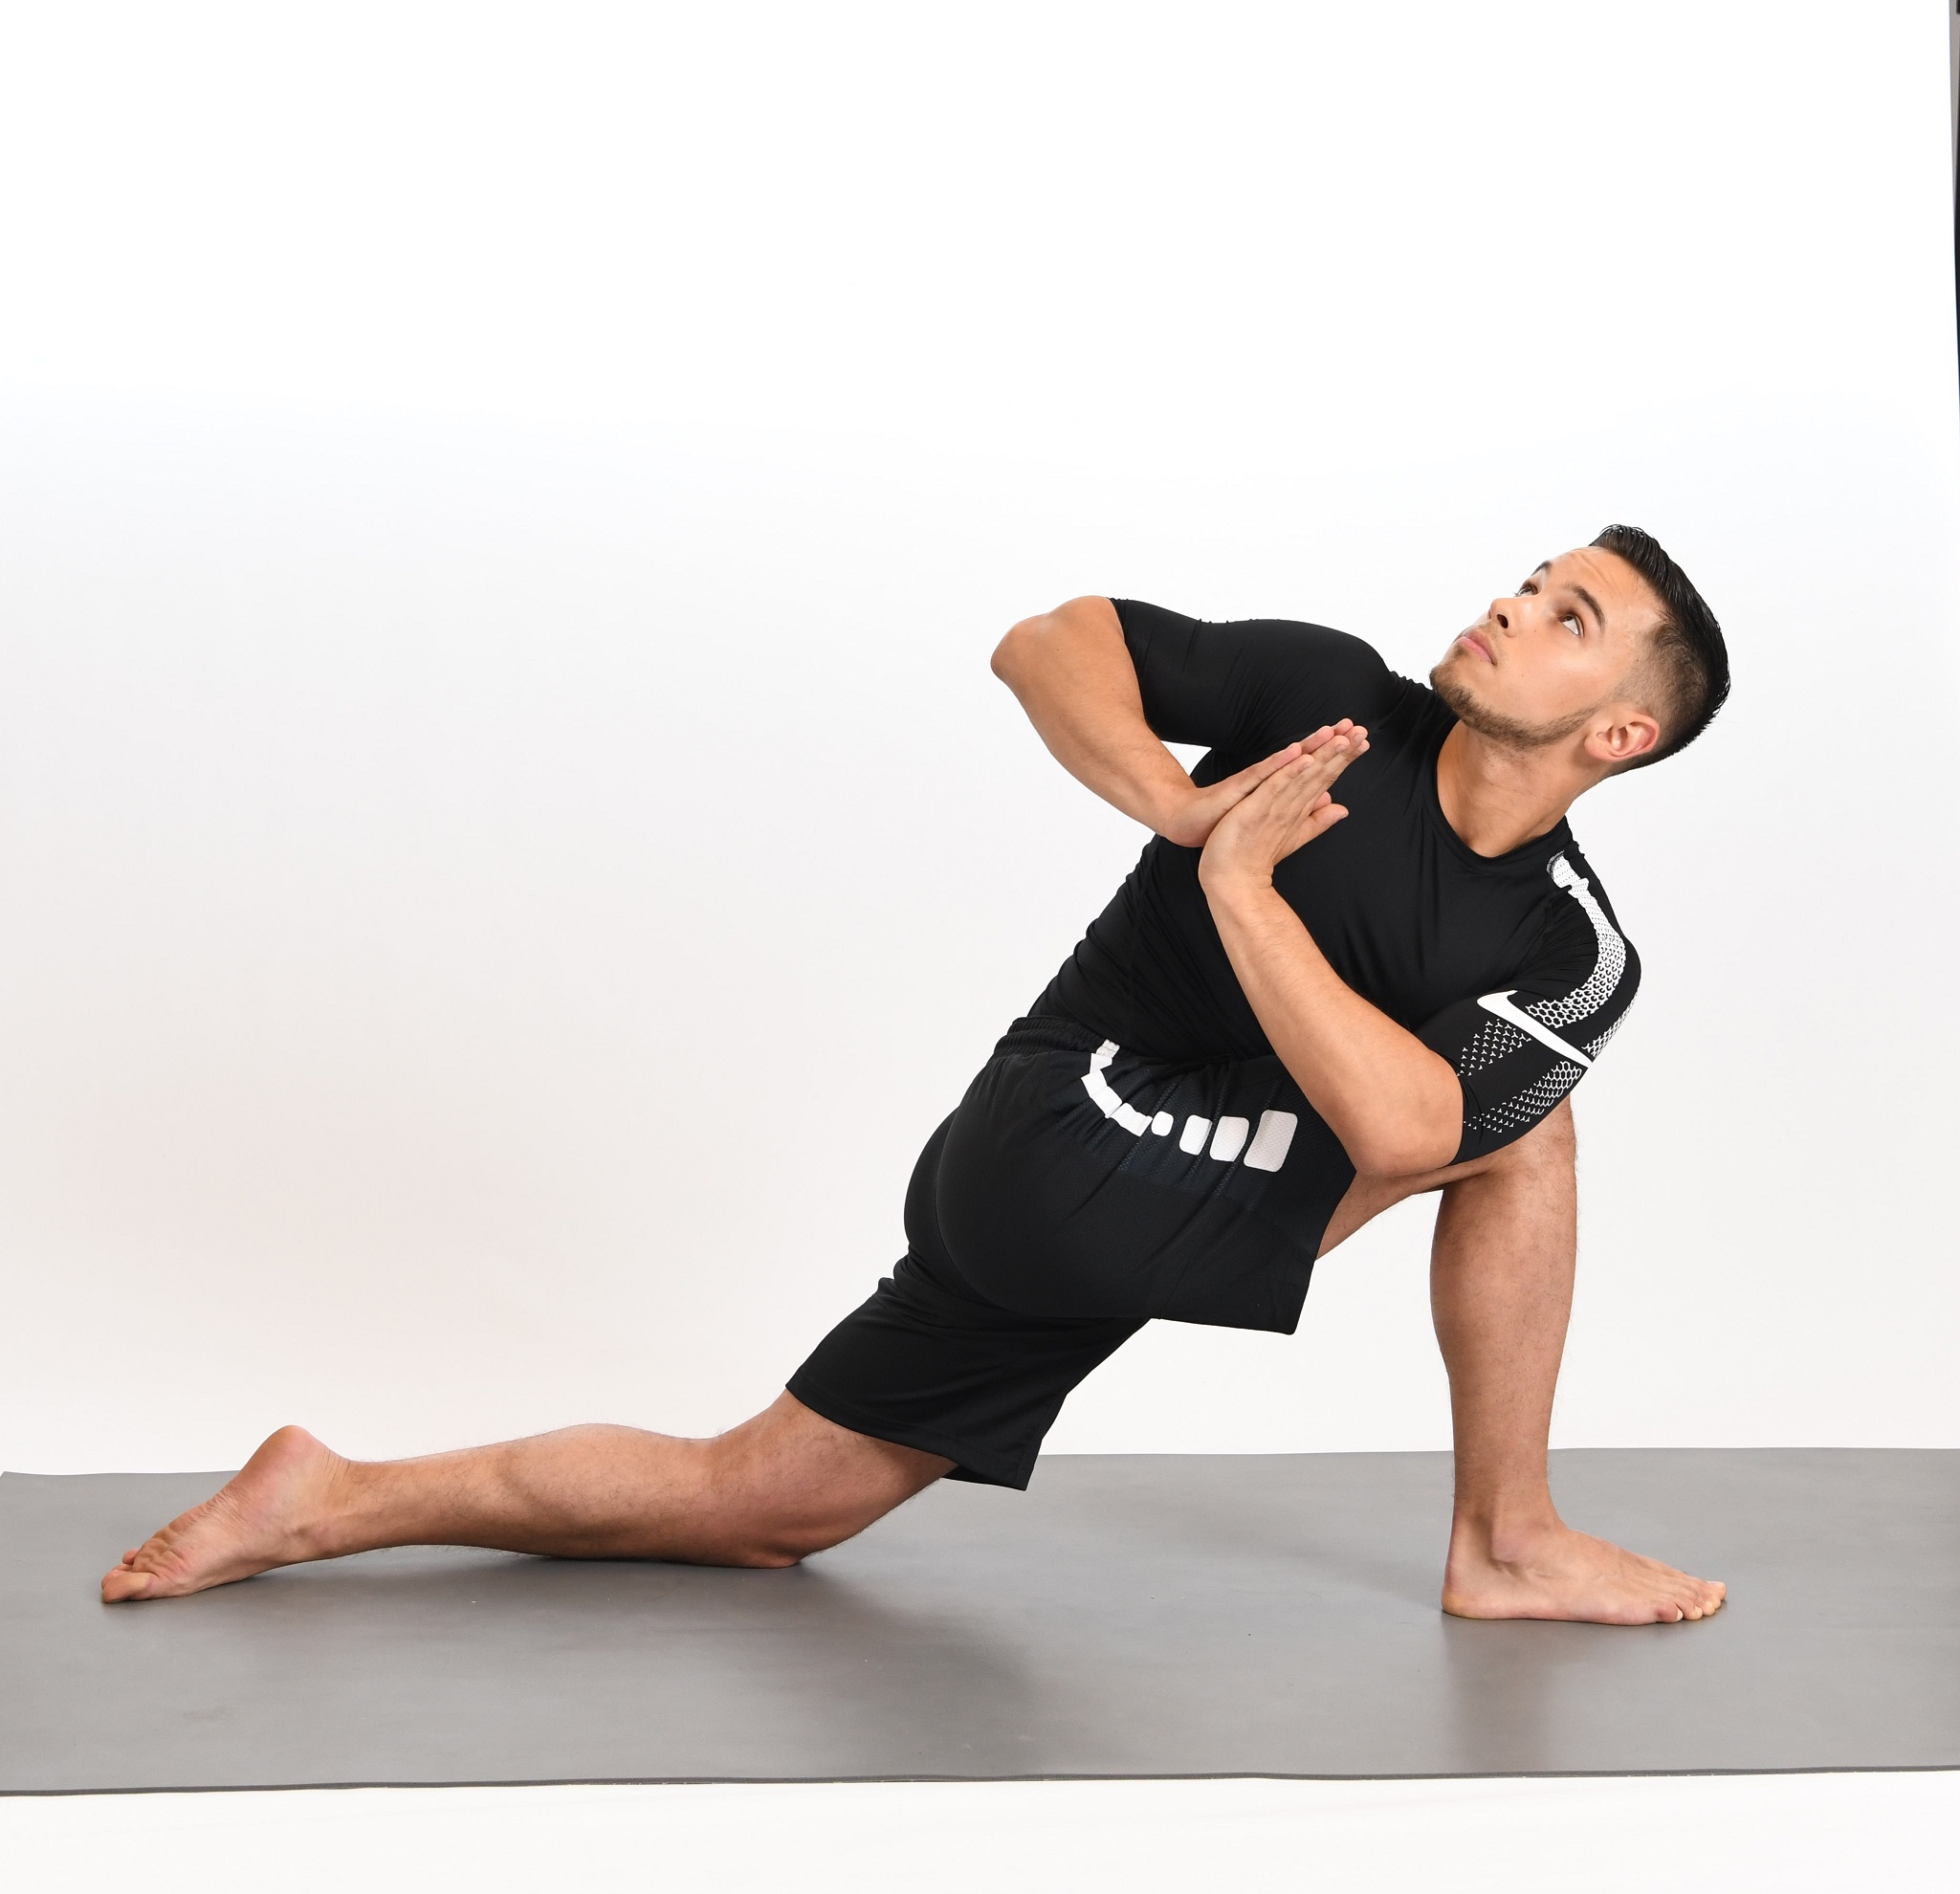
- Try crescent lunge twist as a variation to add a deeper level of focus on balance and to increase spinal rotation (see variation 2) – while in crescent lunge with right leg forward, bring the hands into heart centre, twist to the right, and place the left upper arm on the outside of the right thigh, and twist as deeply as you can until your chest faces right
Variation 2
- Try lizard as a variation to increase leg flexibility and mental toughness because this pose is often held for a longer period of time (see variation 3) – from crescent lunge, bring both hands to the floor on the inside of the front foot; in time you will be able to rest on your forearms but, until then, use blocks.
Variation 3
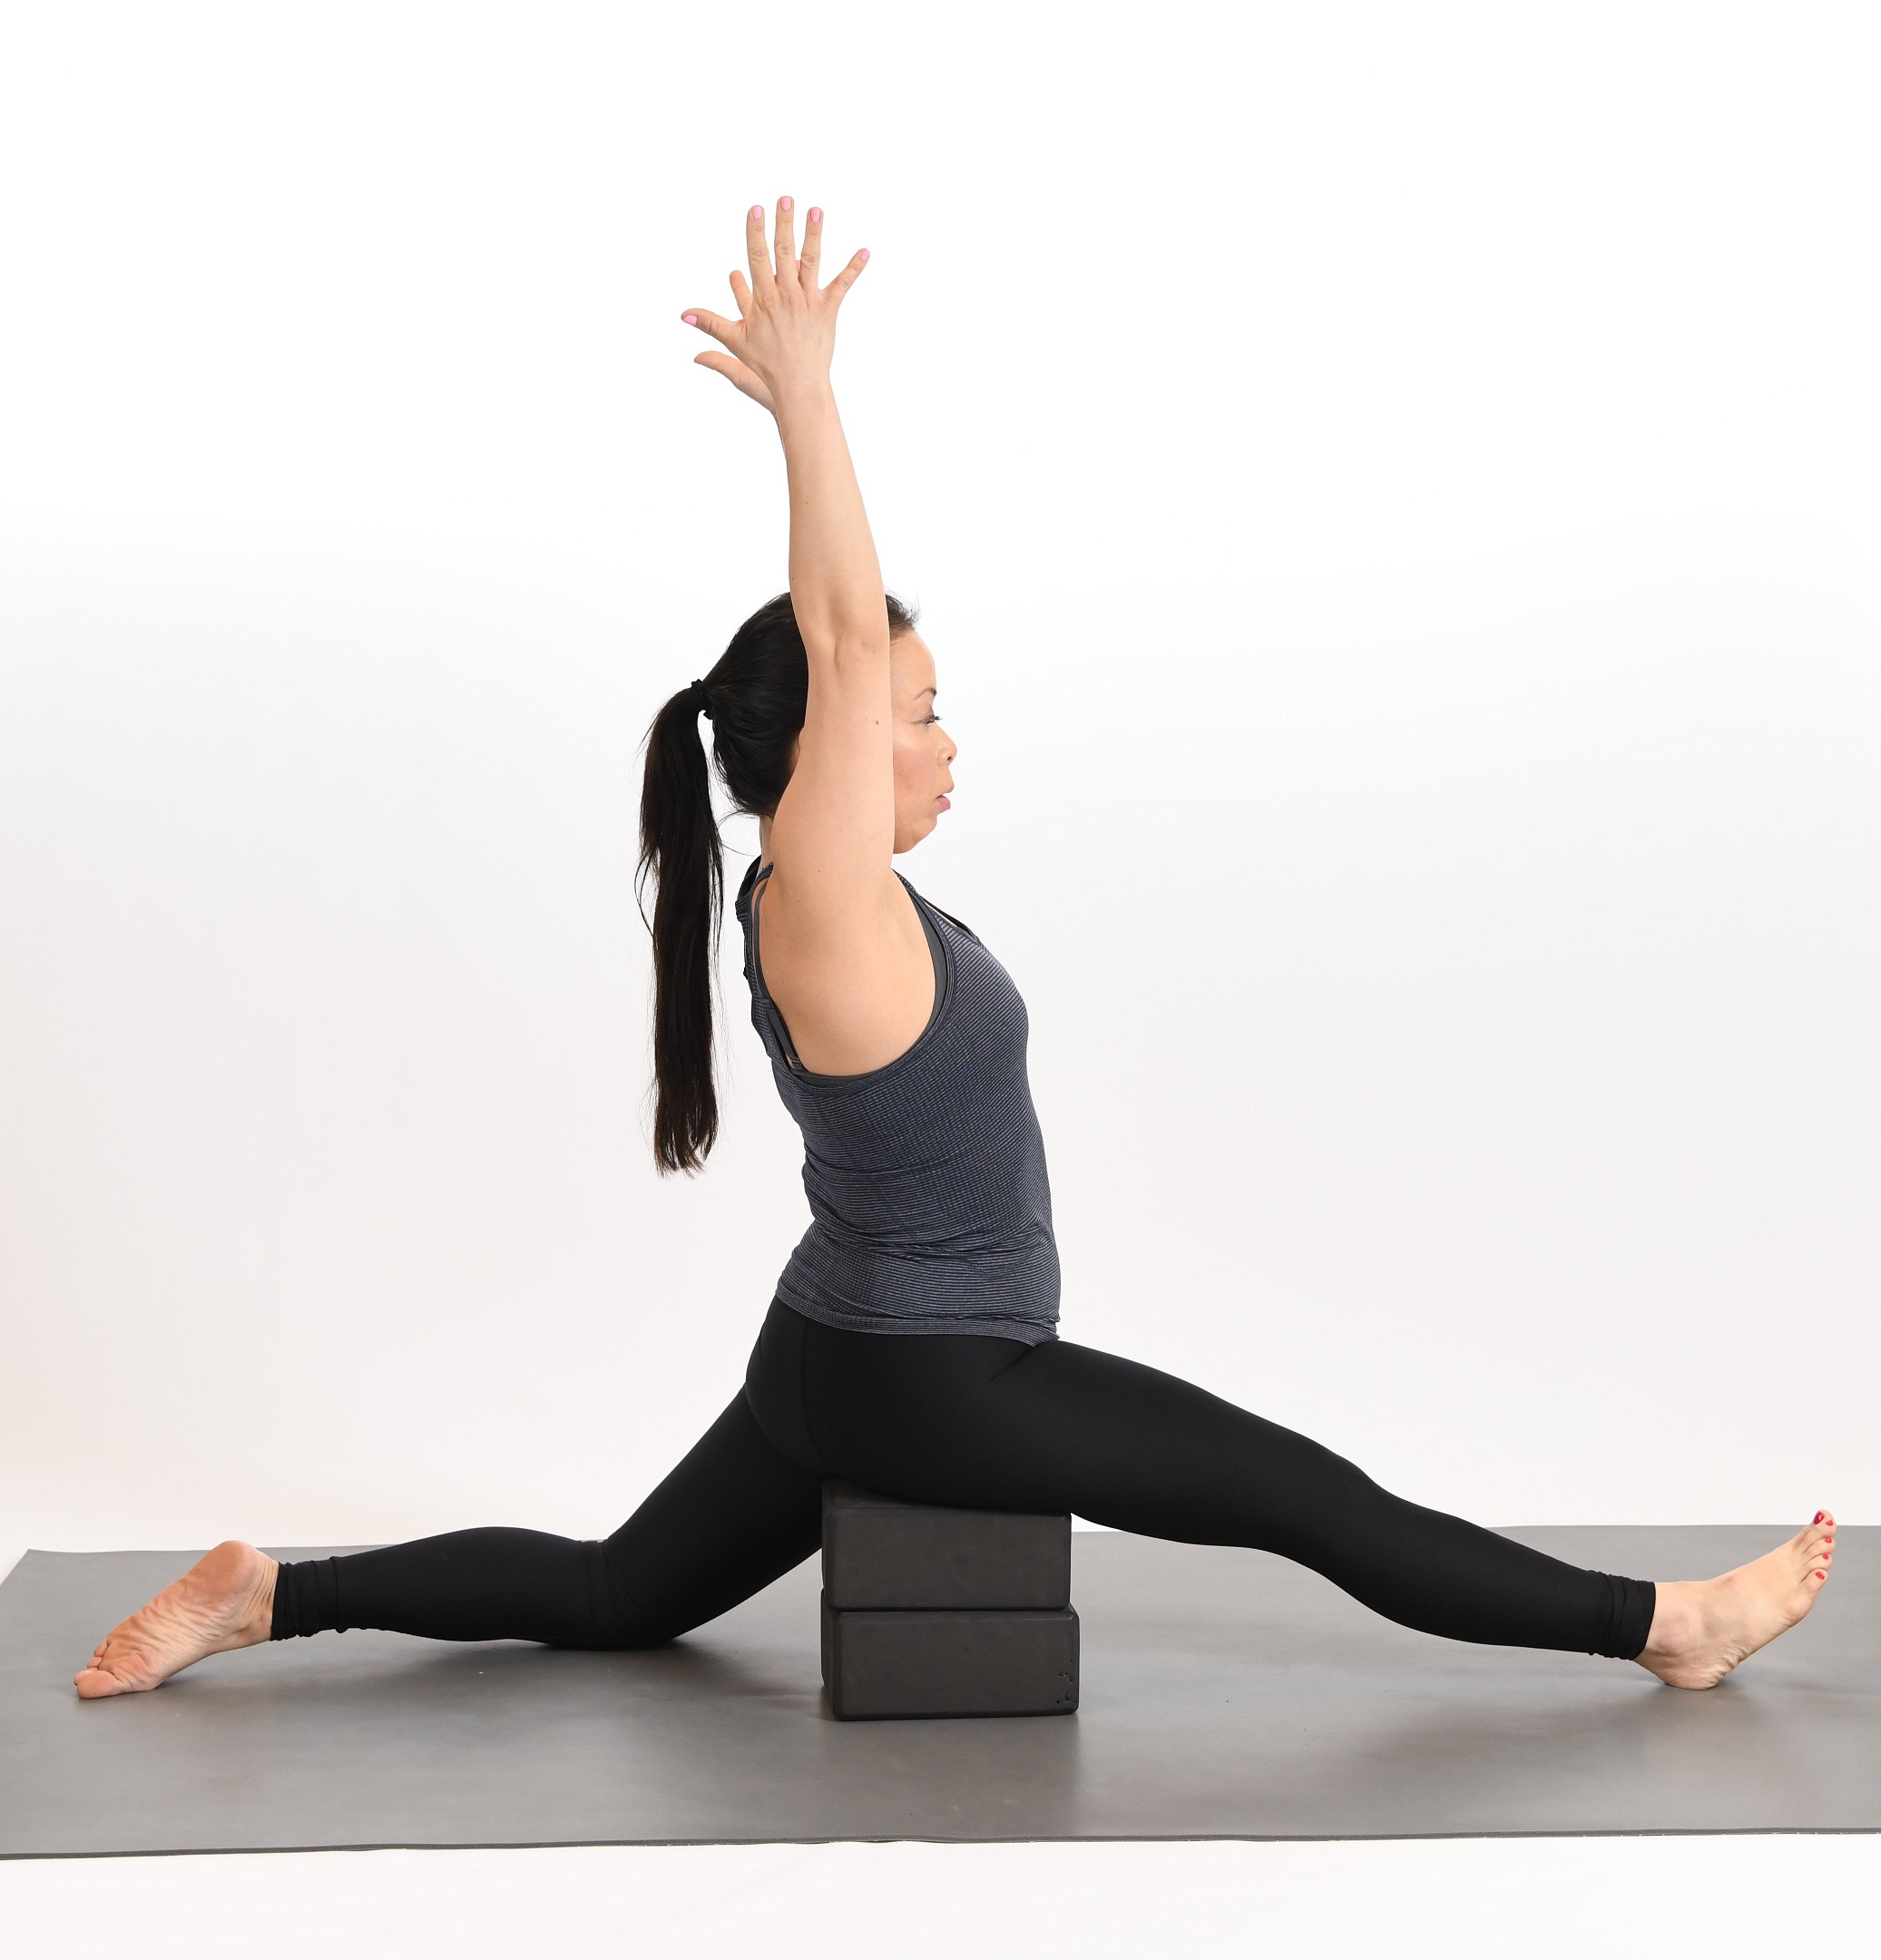
- The ultimate expression of a crescent lunge is to prepare your body for a split (see variation 4) – in knee-down lunge, you place two or more blocks under your right hip (if your right leg is forward), continue to inch your right leg forward and your left leg back until you can settle in a split preparation with your hip on the blocks, then hold there and breathe; with time and attention, you can eventually perform this pose without blocks under the hip
- In crescent lunge, push off the back foot, moving the body forward toward the front of your mat and back to neutral again – the lunge push-off stretches and opens the bottom of the foot and toes, and adds stability in the ankle
The above content is an extract taken from ‘Teaching Power Yoga for Sports’ by Gwen Lawrence, published by Human Kinetics. To order your copy, use FitPro member discount code: FP25 and visit: https://uk.humankinetics.com/
Check out our yoga instructor insurance cover.
Where next? Read even more yoga content HERE